If you follow my blog, you might have known that I love to collect things every time I travel to a new place. But instead of collecting souvenirs like magnets, shot glasses, key chains, or whatever you name it, I prefer to collect things like maps, bus/train/plane tickets, sight brochures and local currencies. It doesn't mean that I don't buy any souvenir at all. I just buy things that I find worth every penny to remind me of those places I've visited. I tried collecting things like magnets, but honestly I'm not a shopper and I often ended up leaving a country before realising I forgot to add to my collection. The ones that always in my bag, even without me trying to remember, are those things I have used during my trip. I have trouble throwing these things away because they remind me of many bittersweet moments I had during my trip. As cheesy as it might sound, but I do not only tend to collect things, but what's more important is the story behind each of them.


One day, I realise that I need to organise some of the items I collect on my travels - combining tickets, brochures, maps and the like, perhaps even make them together into something that could easily memorialise my favourite trips and places. I had thought about making scrapbook, but then I didn't have time to scrapbook everything. I finally came up with the idea for making a travel frame. The first thing that popped into my mind when I was about to make a travel frame is, of course, the photo frame. I was thinking to put the travel collections in a photo or scrapbook frame (the one that you can find in almost any book stores, which is usually sold with the scrapbook paper). But after I had made one and was about to make the second travel frame, I began to doubt my idea of using both photo and scrapbook frame. Firstly, they are ridiculously expensive. The cheapest photo frame that I found was about 25.000 IDR, which broke within a few days. Secondly, they're not convenient enough. If one day I move to a new place, it's almost impossible to bring all the frames because they definitely need more space.
So finally, I got this blessing in disguise, because after the second photo frame I had bought was broken, I came up with another idea. The only thing that remain was the paper frame with the travel collection. And I was thinking hard. Should I just buy another new frame and put the paper in it? What if it wouldn't last very long like the previous one? It suddenly crossed my mind that it would have been fine to just hang freely without glass or any 'boundaries'. Why would I waste my money on expensive frames if I could make the cheaper one? Why would make life inconvenient if I could make it more convenient?
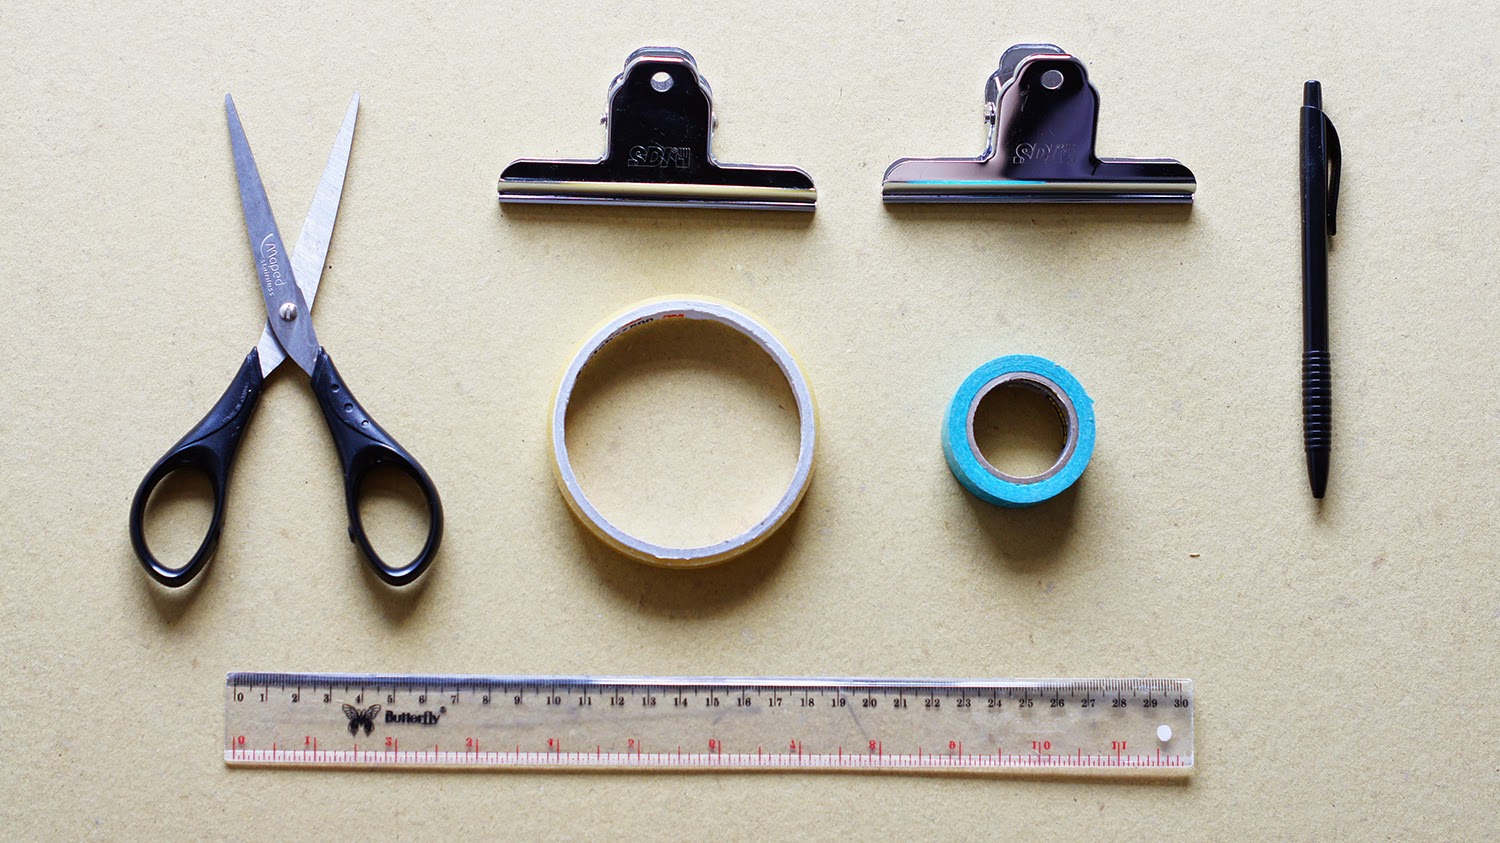
What You'll Need
Frame Supplies
Paper (actually I forget the name of this kind of paper, but it's definitely the one that harder than carton), scissor/cutter, ruler, metal binder clip, double tape, scotch tape and other decorative tape.
Travel Supplies
Maps, postcards, key chains, currencies, tickets, and other souvenirs you collect on the road.
Steps
Measure the paper to 30 x 25 cm,
this size is based on the photo frame size
Cut them out with scissor,
or cutter, for an easier and more precise cutting
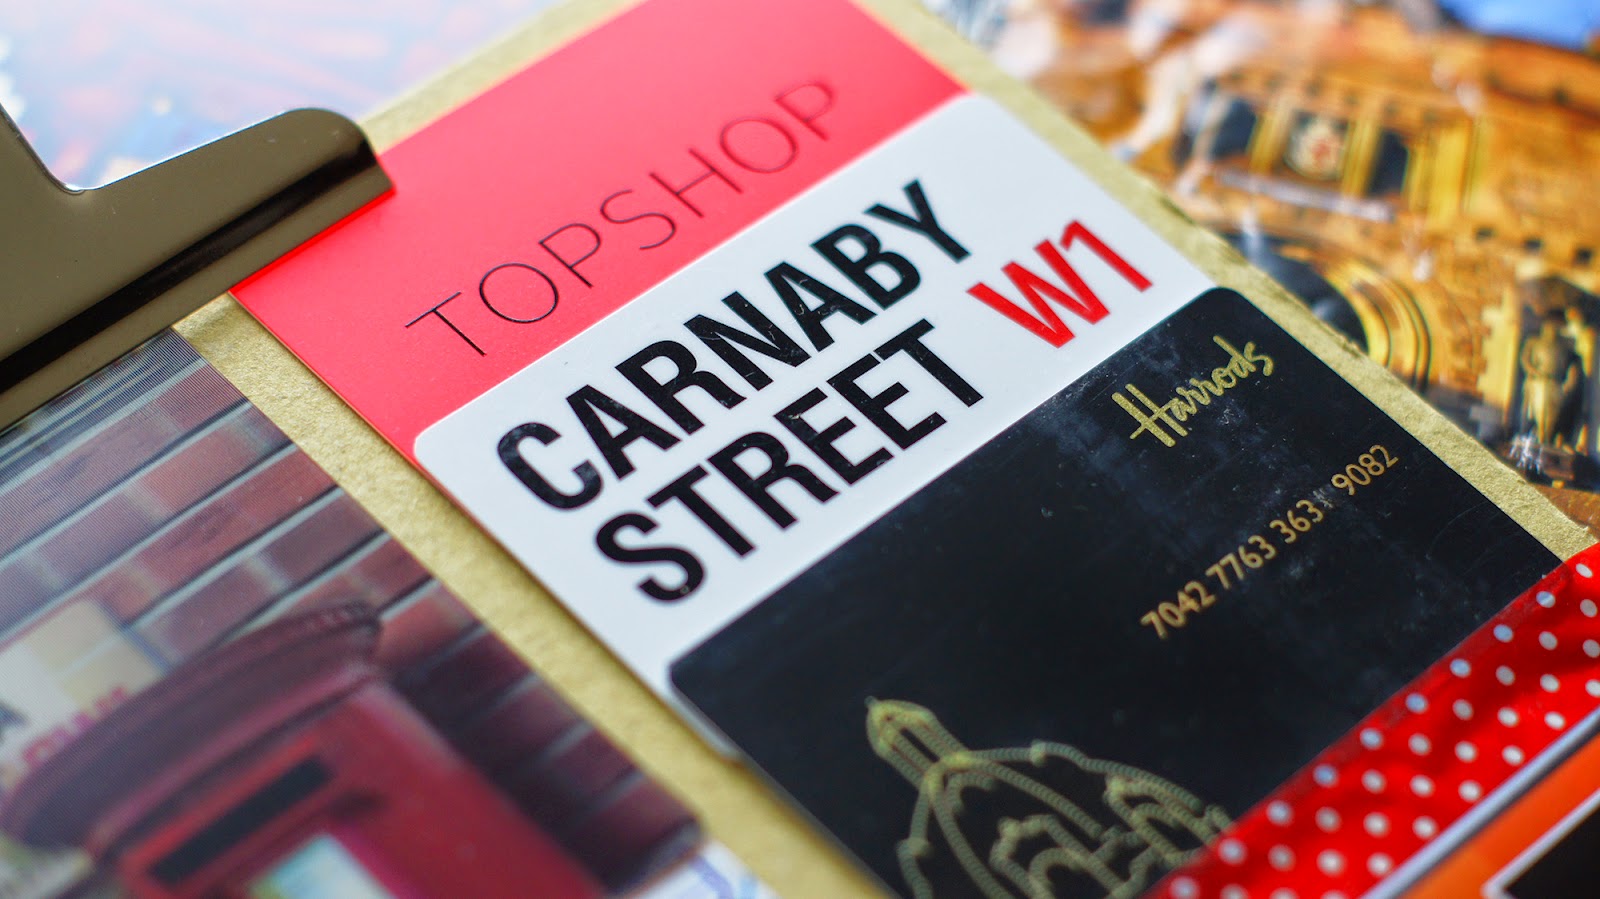
Put your travel collection together on the paper,
using the various tapes (double, scotch and decorative)
Use the binder clip to hang them,
for this paper size, I use the 4" binder clip.
AND VOILA,
My travel frame is done!
I can get my own travel frames that cost less than 15.000 IDR per frame. I decided to hang them in my living room -they're one of the first few things you would see and notice when you enter my apartment. They make me so happy every time I look at them, not only give me pleasure to remember a particular experience or place, but also give me the satisfaction to make the right decision, that make them on my own rather than buying expensive and inconvenient frames :)
This comment has been removed by the author.
ReplyDeleteWah bagus juga nih idenya. Tapi sayang printilan abis jalan-jalan kemana kek gitu ga tau pada kemana... :((
Deletethanks mas! mulai dikumpulin dong berarti perintilannya hehe
DeleteKarton duplex ya Zuu?
ReplyDeleteI also have the same problem, can't throw away travel memorabilia easily :))) yang daun lucu banget!!!
haha toss mba Tiananda!
Deletenahh itu kayanya bukan mba, lebih tebel lagi dehh perasaan. lupa banget namanya soalnya ga familiar huhu.
Wow..so inspiring.. thank u for sharing ^^
ReplyDeletepleasure is mine :)
DeleteMba Zuu, baru aja beli buku buat nempelin travel supplies. Kalau buku da ga bisa dipajang. Ini mah bisa dipajang. Kereeen. Makasih sudah berbagi :D
ReplyDeleteHahaa iya sihh ya kalo buku ga bisa dipajang, cm bs disimpen doang.. Sama samaa mba amah :)
Deletehi! found your instagram by chance and it leads me to this tutorial. I made one myself shortly after, it's totally fun and pretty. thank you for the idea!! if you don't mind, I posted it here : http://fitrisays.blogspot.com/2015/06/travel-keepsake.html (I also linked your instagram and blog). Btw, It's super fun to read your blog :) :)
ReplyDeletehello there! thank you for reading my blog :)
DeleteOh, I just saw the travel frame you made and it seems nice! :D
Beautifully explained blog about photo frames. They are more than just décor – they showcase our memories and add warmth to walls. If anyone is looking for unique and stylish photo frames online, I highly recommend Vibecrafts. Their collection has premium-quality designs at affordable prices, perfect for living rooms, bedrooms, or offices
ReplyDelete